Showing posts with label made for you:. Show all posts

Friday, December 28, 2012

made for you: felt story board

Made sometime ago, but here is our felt storyboard with characters from the gingerbread story,  printed, laminated and with a velcro sticky dot on the back that stick to the felt, but don't wreck it when pulled off.


the clouds, sun, tree foilage, moon and flowers are interchangable after using the press-snaps on both parts.


This project is one of those that you have packed away, and pull out on a day when things aren't happening right, and keeps little fingers occupied.
 
L.

Friday, December 7, 2012

made for you: activity bag

A few years ago I made some 'activity bags for the three children, to take on road trips and holidays, filled with a few special items, new book and a drawing pad with crayons, or for the youngest one, it was baby toys. What they could fit in, was what they were allowed to take along. 
Made from fine cordouroy with a drawstring top, I cut up a loved t-shirt and added some colourful buttons for a herbie-loving son. I stitched with a straight stitch 0.5cm around herbie to allow the stretch fabric to roll. This still hangs happily in his room, ready for the next road trip. 


I have kept their drawing books. Nice to look back on and see what they drawed in the back of the car, how their scribbles turned into drawings and what kept them occupied early in the morning while they were still in their camp beds.

Now with the youngest one requiring one for this holiday season, I based it on the Hobo Sack tutorial via  Belle Cherie Handmade. With some girly cotton, its all set to be filled with treasures.


L.


Monday, December 3, 2012

made for you: cotton summer bag

A summer drawstring bag. 100% cotton.
 
 
  Perfect for a little lady. Just the right size to carry little important bits, slung across the body, so no falling off the shoulder.
 
L.

Monday, November 19, 2012

made for you: summer dress

With summer almost popping its head around the corner, and the purchase of those Red Shoes, I completed my WIP on friday. Our little miss-2 loves any skirts or dresses, and will only wear shorts or pants if she really has too. She calls them a wee-skirt or a wee-dress, because when you do twirly-whirls, you say "weeeeeeeeee". So I had to look for a pattern with frills. More frills the better. I borrowed a childrens sewing book by Ottobre and used the skirt pattern from a dress that I liked, and altered it to fit the bodice.
 
 
My sewing machine had a bit of a belly-ache at first, and wasn't happy stitching for once. After a bit of oil, new needle, lint removal and some good thread, it was happy to go again. (its is in dire need of a service) With it being my first project to use fabric and crocheting together, I am very happy how it turned out, and so is little miss.
 
Here is the link to the bodice pattern. I did alter it slightly - I made the straps a little longer, and also added more rows at the bottom where it joined the dress - top pic. A very simple pattern, and quick to make too.


I machine stitched the bodice to the skirt, and surprisingly you cannot find the stitching back!
 
 
 With the bodice made from 95% cotton, 5% silk, and the skirt being open and loose, it is going to be nice and cool for summer.
 The hems of each frill was finished with a small, close zigzag.
 
 A matching headband quickly whipped up from here, thanks to Bec for the link!
 
pretend play yesterday - heels just finish it... :)


and for a two-year-old, it does the perfect 'weeeeeeeee......'
 
and what I like best about this dress... is that it isn't pink. or purple. and it is still so ever girly. must be those frills.
Its ready for the wash. I really dislike washing things for the first time.
L.

Thursday, November 15, 2012

made for you: millie (monday) monkey

Meet Millie. Monkey Made on a Monday Morning.
 
 
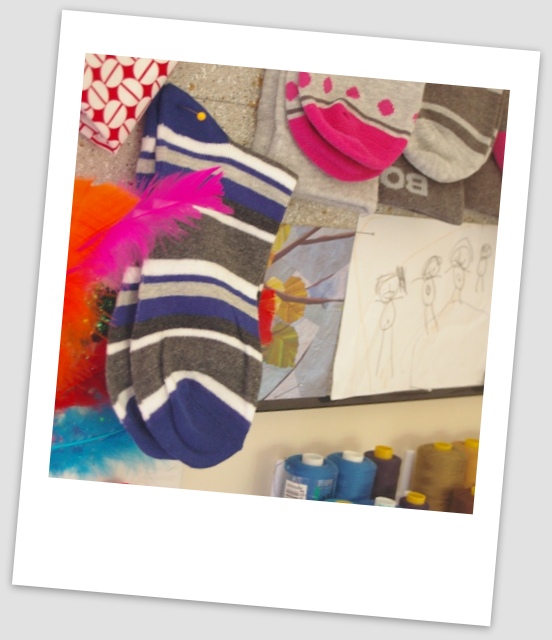
Made for a special friend, who I got to have a catch-up visit with. I chose to make Millie out of a pair of Explorer socks (nice thick socks that are generally worn inside workboots) because of her love for the outdoors. **So happy I could find female coloured Explorers - and striped at that!  And to be honest, I will make future sock monkey's out of Explorers too. I am so much happier with Millie then Rio. I think it is because of the thickness of the socks.

 I wanted to have the Explorer sock tag visible so made sure that I cut the right sock for the legs. I also wanted to leave the fluffy-rolled top that Explorer socks have, visisble.
 
 
It is a relatively easy pattern to follow, using machine and handstitching, with beautiful clear photos.


 Rio and Millie

pattern link: Sock Monkey from CraftPassion.


**photo update: during cooking dinner time last night, master 8 comes into the kitchen and proudly tells me that he has "found a pair of socks in his cupboard, that would make a nice sock monkey for his birthday" (it's not till next October.) This morning I found it pinned up on my board. Thank you son. Consider it done. Another one to join Rio coming up.**
 
L.


Tuesday, November 6, 2012

made for you: sock monkey (RIO)

Another handmade gift from last week.
Rio, the sock monkey.


With little miss 5, we managed to get Rio made in an afternoon. She helped by pushing all the stuffing into his arms and legs, and loved seeing him being put together.
Pattern link: craft passion
 
 
Rio was made from a mens sock: 11-14. Different sized socks make different sized monkeys.
And I have a few more pairs of socks set to the side, ready to be made into more sock monkeys.
 
L. 


Tuesday, October 16, 2012

project completed. well almost.

My house is quiet except the kiddy chit chat. My house is staying relatively tidy. My house got the vacuum it needed rather then the quick sweep. I miss the helping hands. Pirates of Penzance soundtrack is replaced with kids songs. Lunch time was quiet. The dogs have to have their morning snoozes by themselves again. My fridge and pantry are full again. Routine is back. My house was a home for 2 weeks; the holidays went too fast. Thankfully it is a short term till the next holidays.


But here is one project that I had started before the holidays that I managed to get completed. Not crocheting I know, but something that is part of our families day. I thought I would share it with you, as we are very happy how they have turned out, and maybe you have issues with your lego instruction books too.

I am not going to take credit for the idea, because I don't have very good brainwaves like this. She knows who she is and if she ever does a post I will link it to hers. This is also why I love (limited) browsing in blogland. Ideas are abundant!

Ever since our children were little, we have invested in lego. We both had it as children, and for some reason our parents didn't want to part with it, so we had to start our own collection. A few years ago Lego was dying out, but thankfully they decided to keep making it. We started with a small tub of duplo when our first was little. That basket has grown over the years, and still gets played with by all four. Towers to reach the ceiling, and traintracks under and around chairs and table legs.

Then we moved on to smaller lego when they were old enough not to put small bits in their mouths. They learned to follow picture instructions and build creations of their own using their imagination. For some time our son had it in his room, and he would play it before bed and as soon as he would wake up. Now that our youngest understands and doesn't put lego in her mouth, it has all moved to the play area, and enjoyed by all four.

But with each lego set, there comes a set of instructions, which aren't printed on the thickest of paper, and easily damaged if not kept well. I have tried various ways to keep them in the past, but now I think we are sorted.


What I thought would be a rather simple job, turned out to be not so simple. 37 instruction booklets of various sizes laminated, cut down and punched, with a ring-clip thru the corner.

 
cutting the spine off or removing staples
 
making sure we unfolded any dog-ears and flattened any rips. 
the small instruction books were nice, 4 pages fitted to a page and there was not much wastage. lined up correctly also limited the amount of trimming up cuts needed.


my poor little laminator did well. I think we chewed through approx four 100per-pack of laminating sheets, and with each sheet taking 1min30sec, that was a long time that it was on.
 

trimming pages to size

 in correct numerical order
 
 awaiting their corner punch, all in their right order.
The kids were banned from touching any of the instruction books till they were passed over with a silver ring. I had a pile of unlaminted, spineless instruction books that would have been a disaster to try and figure out where they belonged if they were messed with.
In the end I enlisted my oldest's help, trusting she had an eye for putting in the sheets straight, and she did a fantastic job, and caught up on some reading while patiently waiting.

and, ah yes, there is crocheting in this post! I crocheted while I patiently waited for each sheet before trimming.

the bigger instructions: you could only fit 1 page per laminating sheet, and there were two of 73 pages in total (37 laminating sheets). Slow process when they take a minute and a half just to heat thru...

A job done!
31 of the boys lego books

6 of the girls lego

And when you have a boys birthday in the holidays, I can now add another 10 to the now-to-catch-up pile. (Thankfully they are small instruction books...!)  Need another box of laminating sheets first.
 
Not a cheap project, but we all agree it was worth the time that it took us. Placed in the same size starmaid boxes as the lego, I think we have given these instructions a long life span, free of page folds, rips and dog-ears, and missing covers.
 
And the children were busy building their sets during the holidays too. With the lego all still sorted by colour in boxes, they managed to make a good dent in the sets, even with some help from Mum! Now we just need a good spot to display the childrens effort. The wooden shelf above my sink is fine at the moment - out of little fingers reach, but with inview that they can still grab and play with it - but oh, who's going to dust that shelf with out breaking the lego constructions?
 
 
I didn't do it all in one day either. The box of 'stuff' sat in the corner of my kitchen, and while I was waiting for veggies to boil, or for half an hour after lunch, I would focus on it, whether it was putting thru the machine, or cutting spines off, or placing them in the laminating sheets.
 
How do you store your lego instructions?
 
L.